Building a Serverless REST API: Direct Integration Between AWS API Gateway and DynamoDB
I'll be honest with you - I used to be that developer who'd slap a Lambda function between everything. API Gateway talking to DynamoDB? Better add a Lambda! Need to format some data? Lambda time! But then I discovered something that completely changed how I think about serverless architecture.
You know that classic "Lambda Sandwich" pattern we all love (API Gateway → Lambda → DynamoDB)? Well, turns out you can actually skip the bread and go straight to the filling. For simple CRUD operations, AWS API Gateway can talk directly to DynamoDB, and trust me, your wallet and your latency metrics will thank you.
Why I Stopped Using Lambda for Everything
Let me paint you a picture. You've probably built dozens of APIs that look like this: API Gateway receives a request, triggers a Lambda function that does some basic data transformation, then calls DynamoDB. Sound familiar?
Here's the thing - AWS API Gateway isn't just a fancy doorman. It's got this incredibly powerful feature called "AWS Service Integration" that lets it talk to over 100 AWS services directly. No middleman required!
In this walkthrough, I'm going to show you how to build what I call a "Movie Database" API. We'll create two endpoints:
- A POST endpoint to add new movies to our database
- A GET endpoint to fetch all our movies
And here's the kicker - we won't write a single line of Lambda code.
So why did I make the switch? Three big reasons that hit me like a truck:
-
Performance: Remember Lambda cold starts? Yeah, those are gone. When API Gateway talks directly to DynamoDB, your response times are consistently fast.
-
Cost: This one's a no-brainer. You're only paying for API Gateway requests and DynamoDB reads/writes. No Lambda execution time to worry about.
-
Simplicity: Less moving parts = fewer things that can break. I can't tell you how many times I've had to debug Lambda functions that were basically just data pass-throughs.
What You'll Need
Before we dive in, make sure you've got:
- An AWS account (obviously)
- Basic knowledge of REST APIs and JSON (nothing fancy)
- The ability to create IAM roles (we'll walk through this together)
Fair warning: if you're expecting to write code, you might be disappointed. This is all configuration, baby!
Step 1: Setting Up Our Movie Database
Alright, let's start with the foundation. We need somewhere to store our movie data, and DynamoDB is perfect for this.
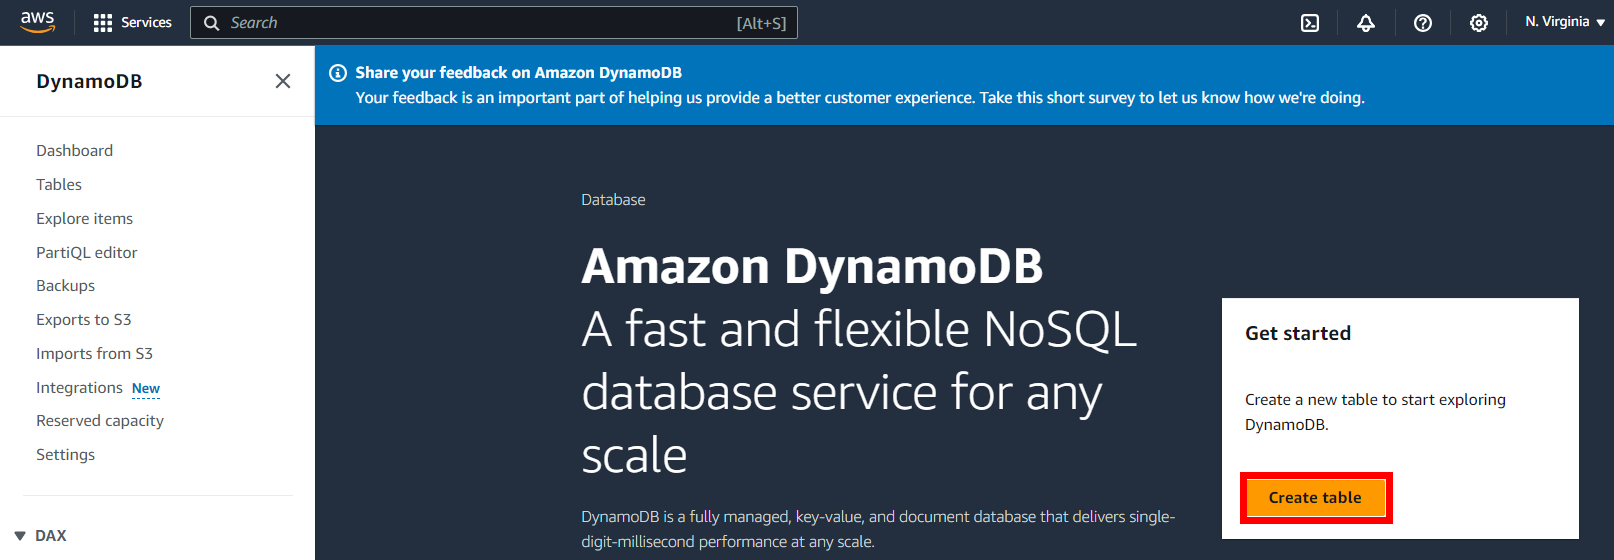
Head over to the AWS Console. I know, I know - navigating the AWS console can feel like trying to find your keys in a black hole, but bear with me. Go to Services and find DynamoDB.
Click on Create table. This is where the magic begins.
Now, here's where I see a lot of people overthink things. For our movie database, we're keeping it simple:
- Table name:
movie-db - Partition key:
movie-id

Leave everything else as default. Seriously, don't touch those other settings unless you know what you're doing. AWS has pretty good defaults, and we're not building the next Netflix here.
Hit Create and grab a coffee. DynamoDB is fast, but even it needs a moment.
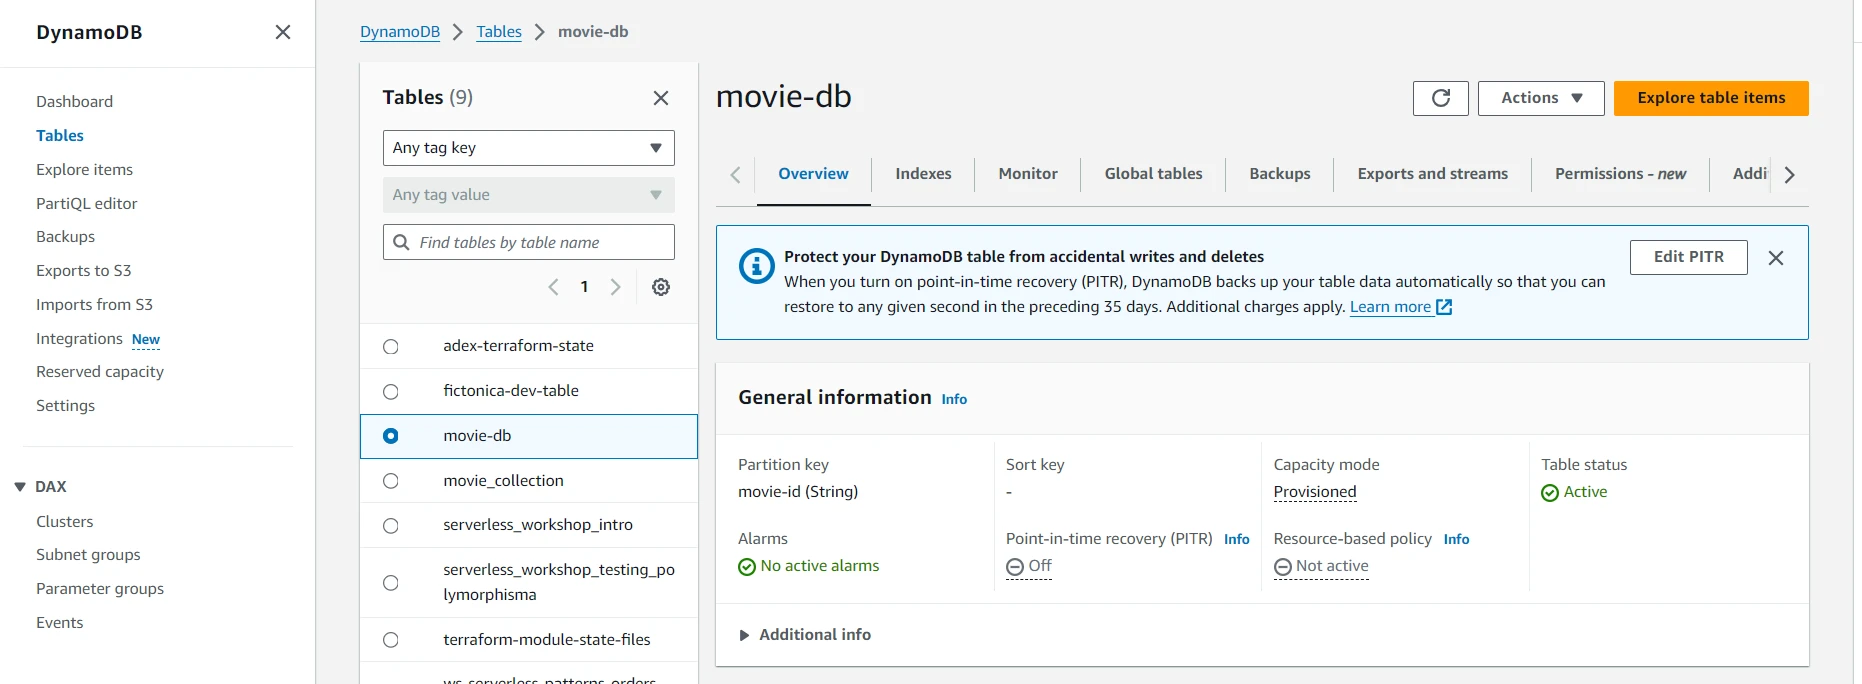
Boom! Your movie database is ready to roll.
Step 2: The IAM Dance
Ah, IAM - every developer's favorite topic (that was sarcasm, in case you missed it). But seriously, this step is crucial because API Gateway needs to be able to chat with DynamoDB on your behalf.
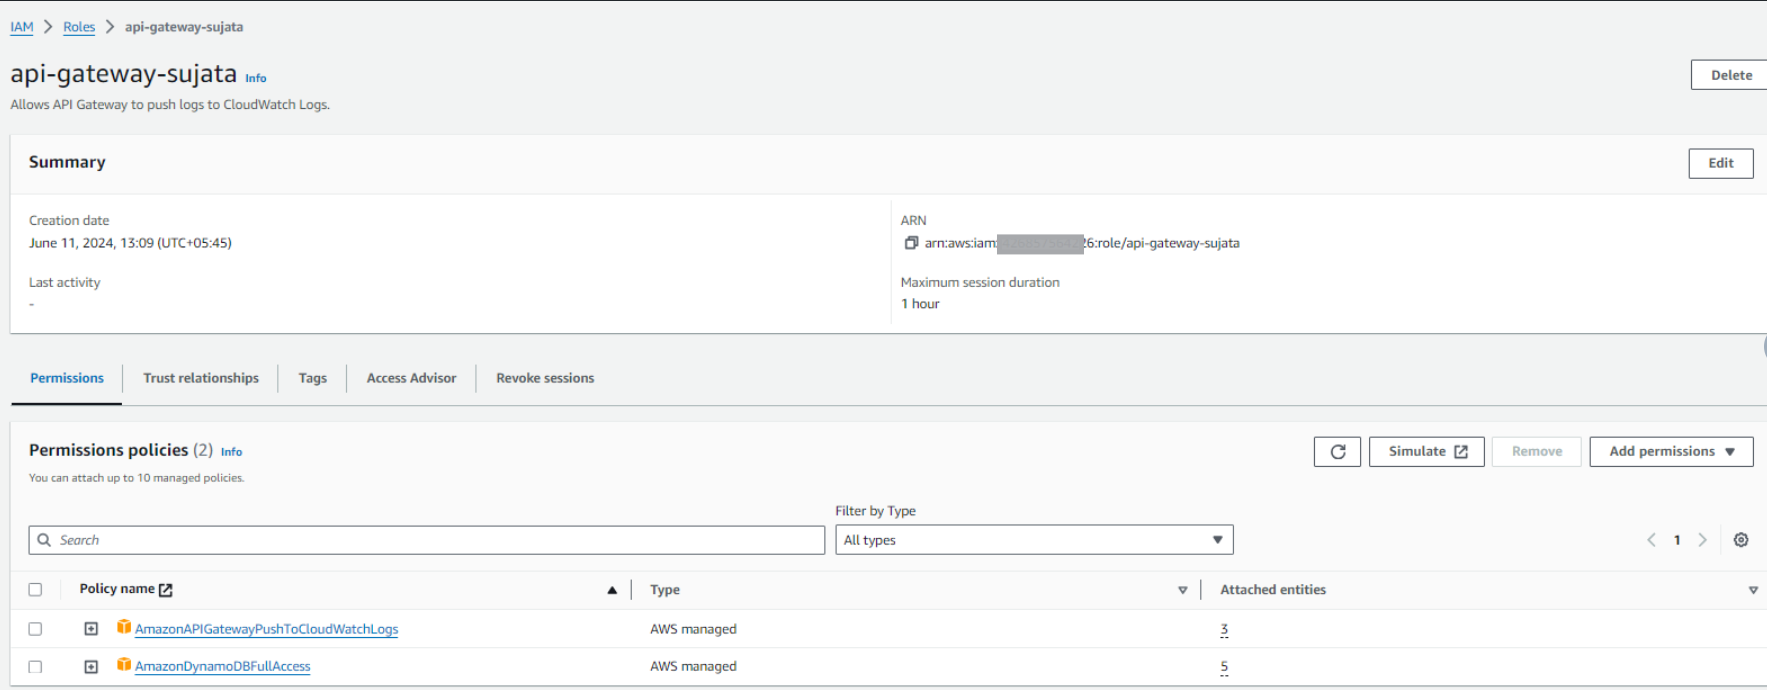
Navigate to IAM → Roles → Create role. Choose AWS Service and then API Gateway.
Now, for the policy. In production, you'd want to follow the principle of least privilege, but for this tutorial, I'm going to suggest using AmazonDynamoDBFullAccess. Yes, it's overkill, but it works, and we're learning here.
Pro tip: Name your role something memorable like APIGatewayDynamoDBRole. Future you will thank present you when you're trying to figure out what this role does at 2 AM.
Important: Copy that ARN! You'll need it in the next step, and trust me, you don't want to go hunting for it later.
Step 3: Creating Our API Gateway
Time for the fun part! Head over to the API Gateway service. If you've never used API Gateway before, prepare to be both amazed and slightly confused.

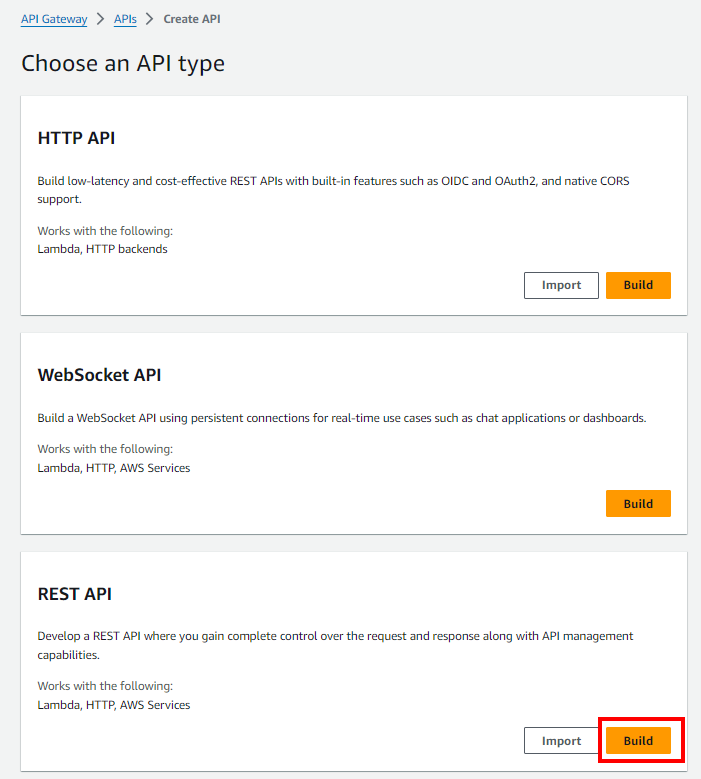
Click Create API, and here's where AWS tries to confuse you with options. Choose REST API and click Build. Not HTTP API, not WebSocket API - just good old REST API.
Choose New API (unless you're feeling adventurous with examples, but we're not).
Give it a name - I went with MovieServiceAPI because I'm nothing if not consistent.
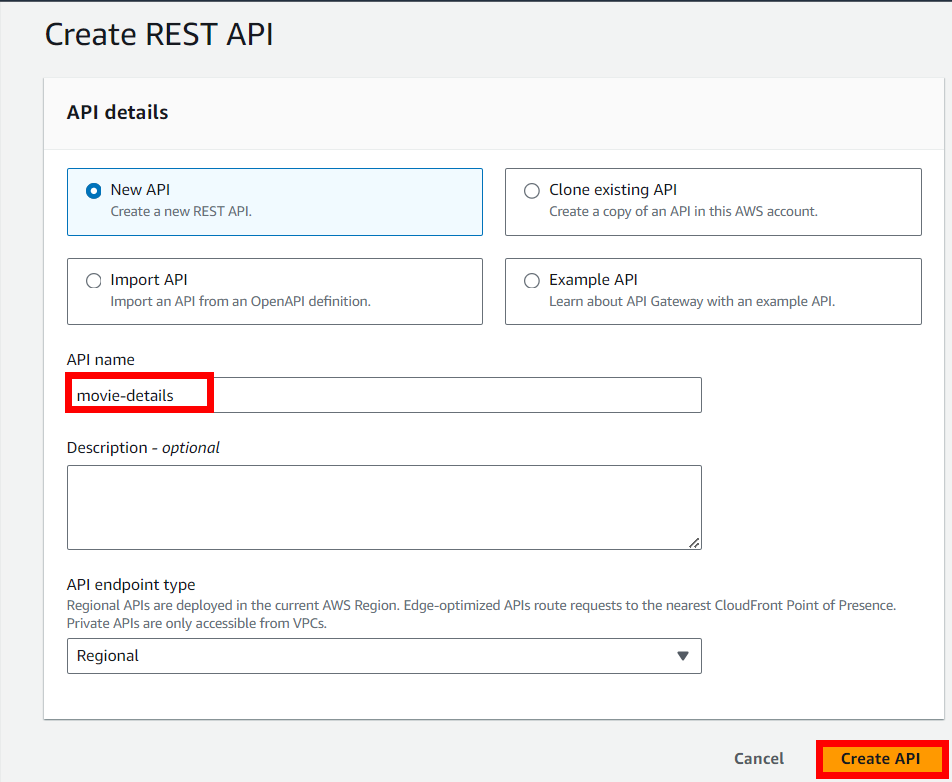
Click Create API and congratulations! You now own a brand new API that does absolutely nothing. Yet.
Step 4: Building the Endpoints
Here's where things get interesting. An API without endpoints is like a car without wheels - technically impressive engineering, but not very useful.
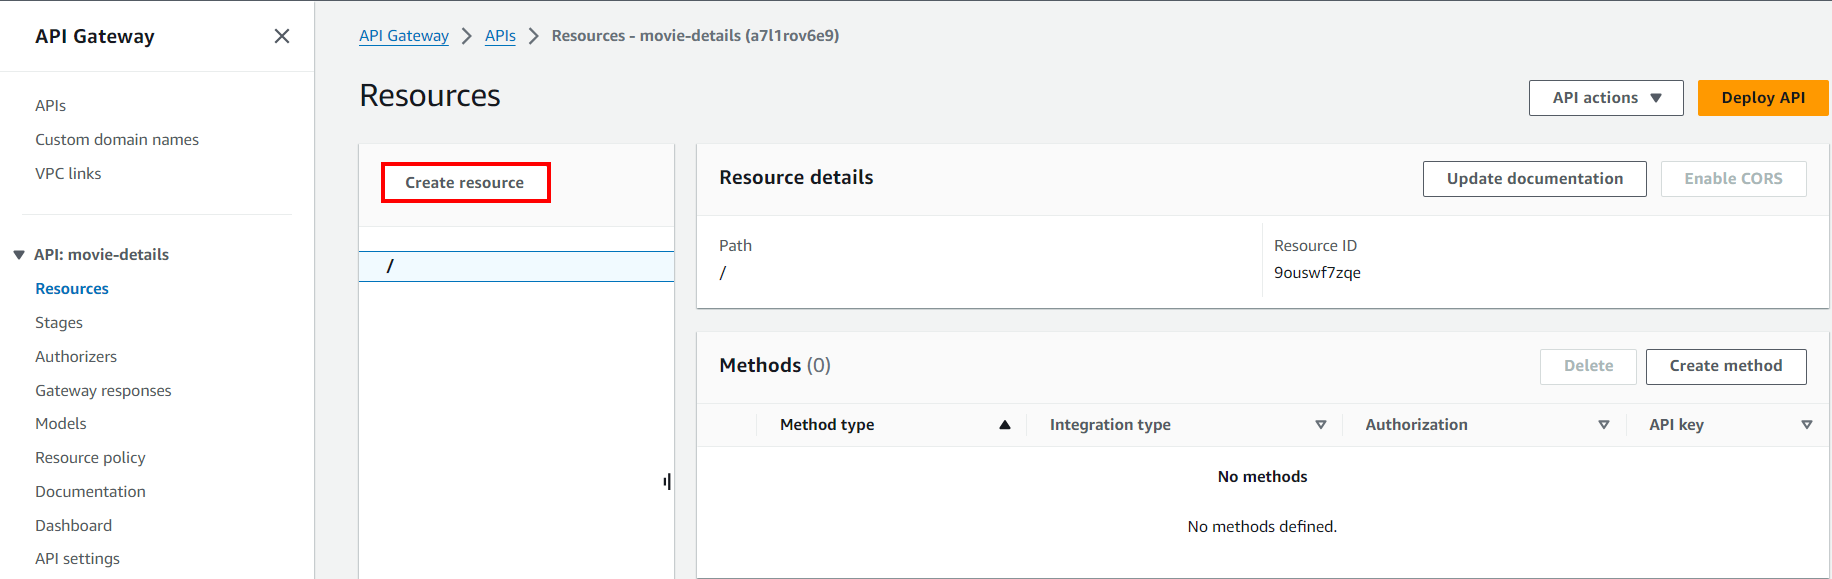
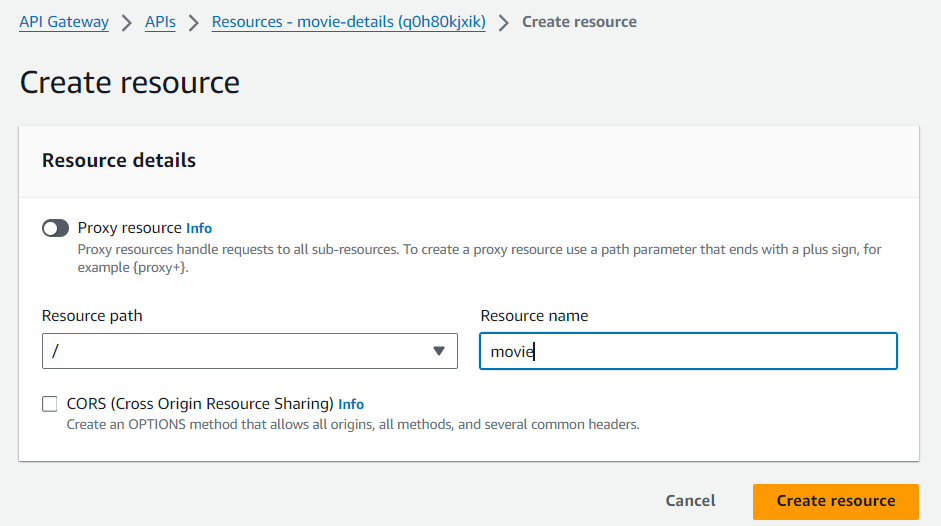
Creating Our Resource
In API Gateway speak, a "resource" is basically a URL path. We want /movies, so let's make that happen.
Click Actions → Create Resource. Set the resource name to movies and watch as the resource path magically becomes /movies. AWS is helpful like that.
The POST Method (Adding Movies)
Now we need to tell our /movies resource what to do when someone sends it data. Select your shiny new resource and click Actions → Create Method → POST.
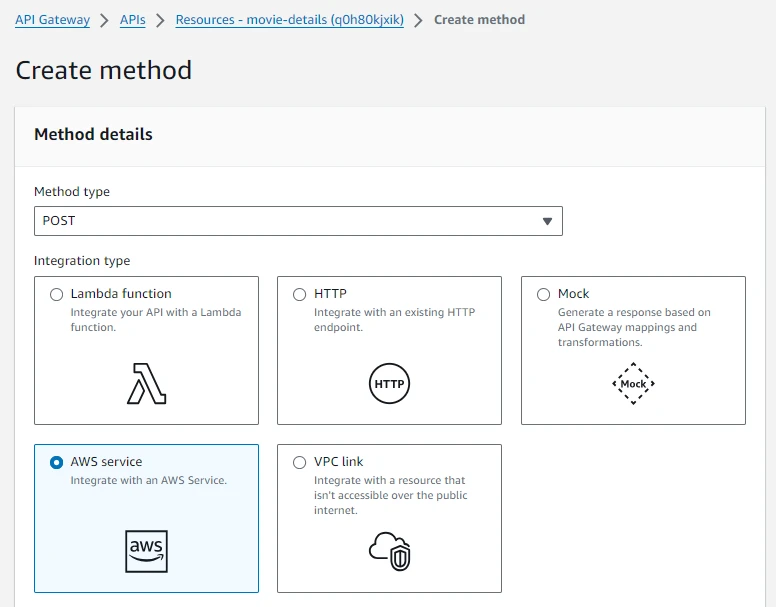
Here's where the real magic happens. Instead of pointing this to a Lambda function like every other tutorial on the internet, we're going to choose:
- Integration type: AWS Service
- AWS Service: DynamoDB
- HTTP method: POST
- Action: PutItem
- Execution role: Paste that ARN you copied earlier
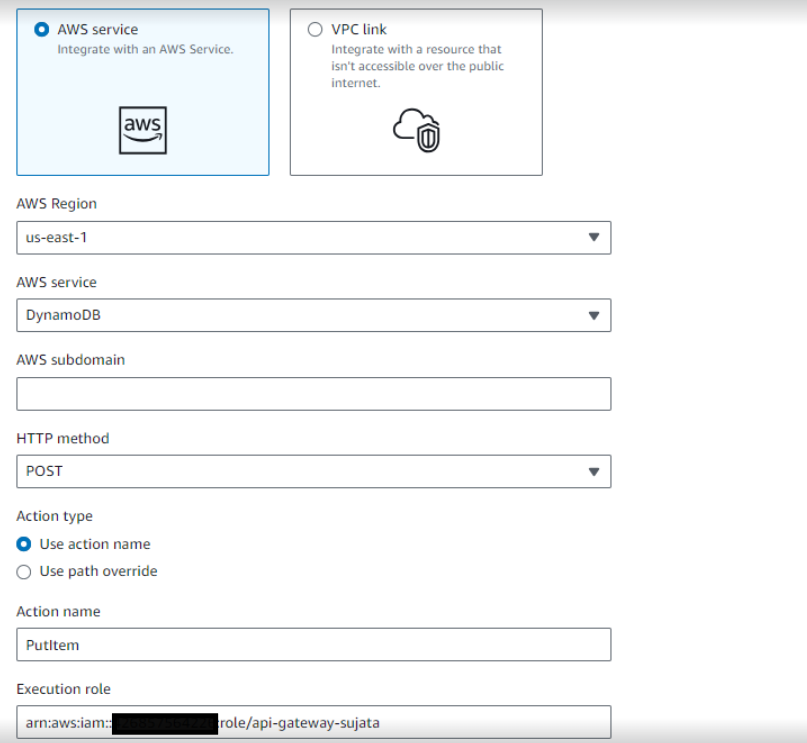
Click Save and smile - you just connected API Gateway directly to DynamoDB without writing a single line of code.
Step 5: The Magic Mapping Templates
Okay, this is where things get a bit technical, but stick with me. API Gateway speaks JSON, but DynamoDB has its own special format. Think of mapping templates as translators.
Click on Integration Request → Mapping Templates.
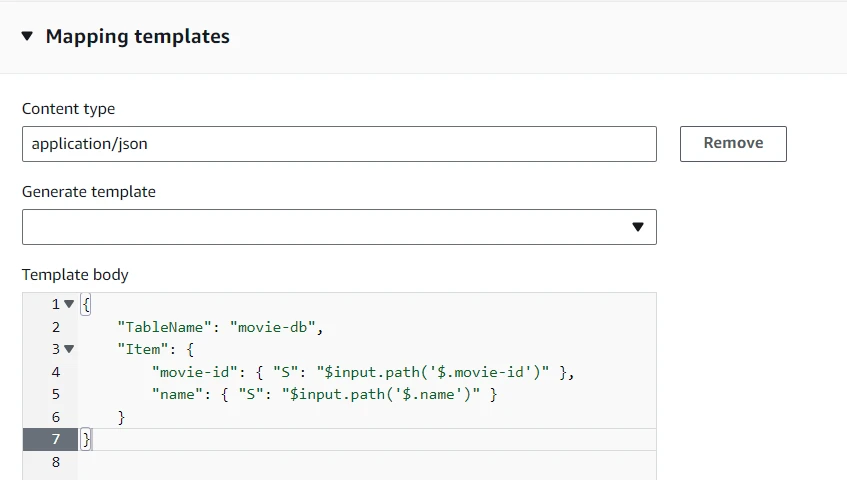
Add application/json as your content type, and then paste this bad boy:
{
    "TableName": "movie-db",
    "Item": {
        "movie-id": { "S": "$input.path('$.movie-id')" },
        "name": { "S": "$input.path('$.name')" }
    }
}
What's this doing? It's taking your nice, clean JSON and converting it to DynamoDB's format. That "S" stands for String type - DynamoDB is picky about data types.
The GET Method (Fetching Movies)
Same drill for the GET method, but this time we use the Scan action instead of PutItem. The mapping template is much simpler:
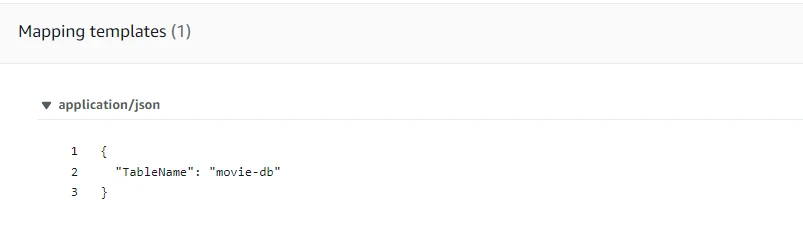
{
    "TableName": "movie-db"
}
That's it. We're telling DynamoDB to scan our entire table and return everything.
Step 6: Testing Time
The moment of truth! Let's see if this thing actually works.
Testing POST
Click that little lightning bolt Test button on your POST method. In the request body, throw in some test data:
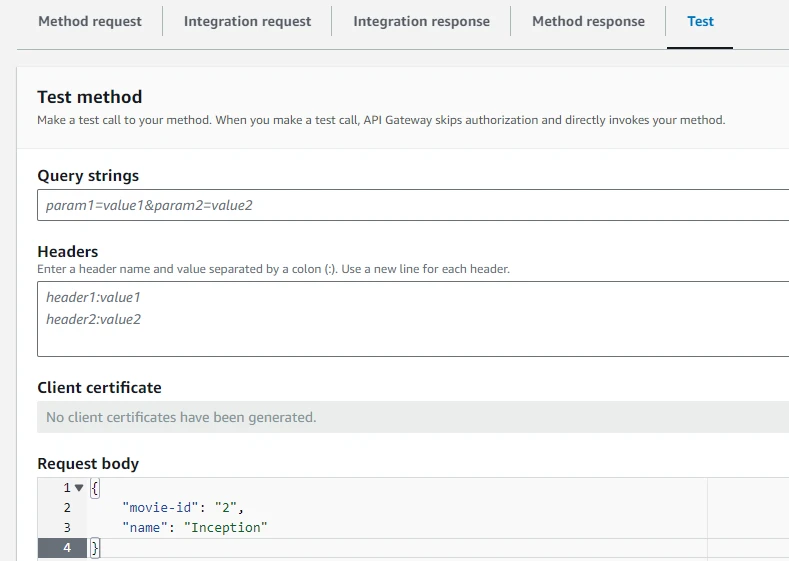
{
    "movie-id": "001",
    "name": "Inception"
}
Hit Test and cross your fingers.
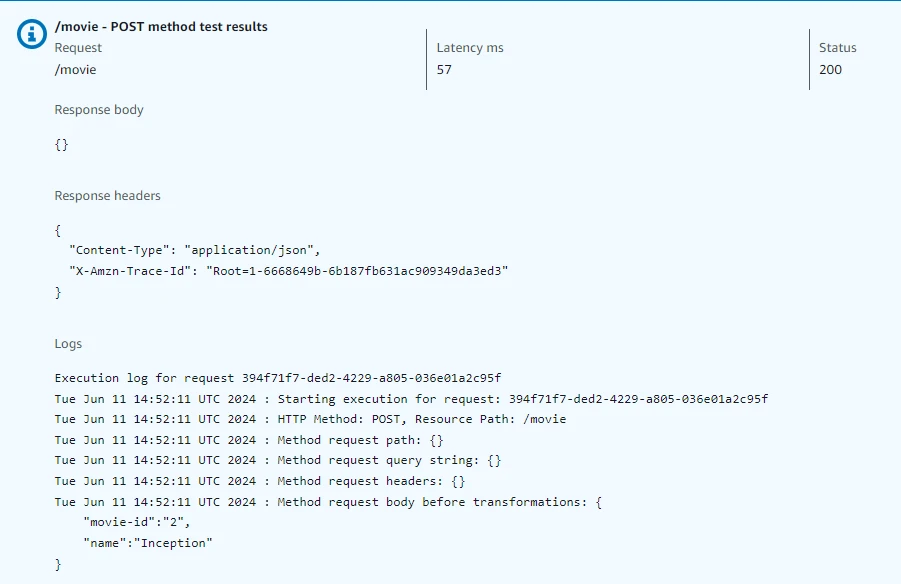
If you see a 200 response, do a little victory dance! But don't take my word for it - hop over to DynamoDB and check if your movie actually made it there.

Beautiful, isn't it?
Testing GET
Now for the GET method - this one's even easier. No request body needed, just click Test.
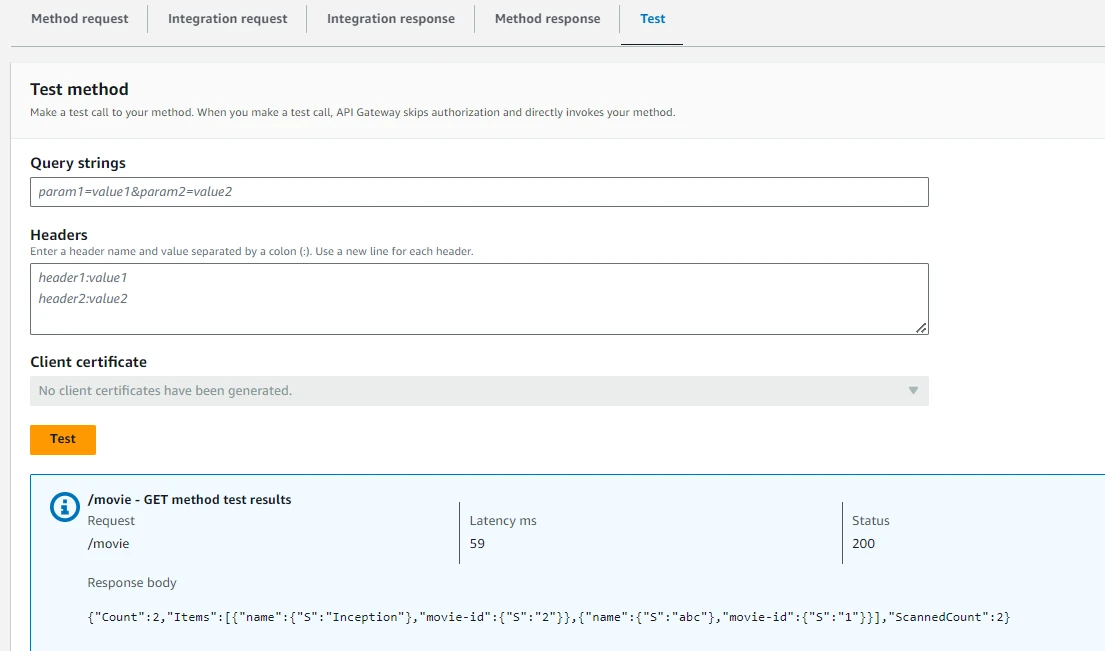
If everything worked, you should see your movie data coming back. Magic!
Wrapping Up
And there you have it - a fully functional REST API that talks directly to DynamoDB, no Lambda in sight!
This approach isn't going to replace Lambda for everything (I still love my serverless functions), but for simple CRUD operations? It's a game-changer. You get better performance, lower costs, and fewer moving parts to worry about.
What's Next?
If you're feeling ambitious, try adding:
- A GetItem action to fetch individual movies by ID
- Some authentication with API Keys or Cognito
- Deploy this thing to a real stage so you can show it off
The beauty of this pattern is its simplicity. Sometimes the best solution is the one that does less, not more.
Happy building! 🚀
Written by
Sujata Dahal